


There are 2 main ways to install NodeJS on a Raspberry Pi. A short way and a longish way.
The short way
The short way uses a script from NodeSource that does the heavy lifting. The installation instructions can be found here but essentially you run 2 lines of code.
sudo curl -fsSL https://deb.nodesource.com/setup_20.x | bash -
sudo apt-get install -y nodejssudomeans you are running the command as a super usersetup_20.xcan be changed to whatever version of node you want to use.installinstalls nodejs and the flag-ymakes yes the default so you as the user won’t have to hit ‘y’ when a question appears
To confirm that node is installed, run
node -v
The long way
The slightly longer way involves downloading NodeJS directly from NodeJS. Before you do, run uname -m to show the architecture of your Pi. It will be ARM something.

Then head over to https://nodejs.org/en/download and find the Linux Binaries (ARM) version.
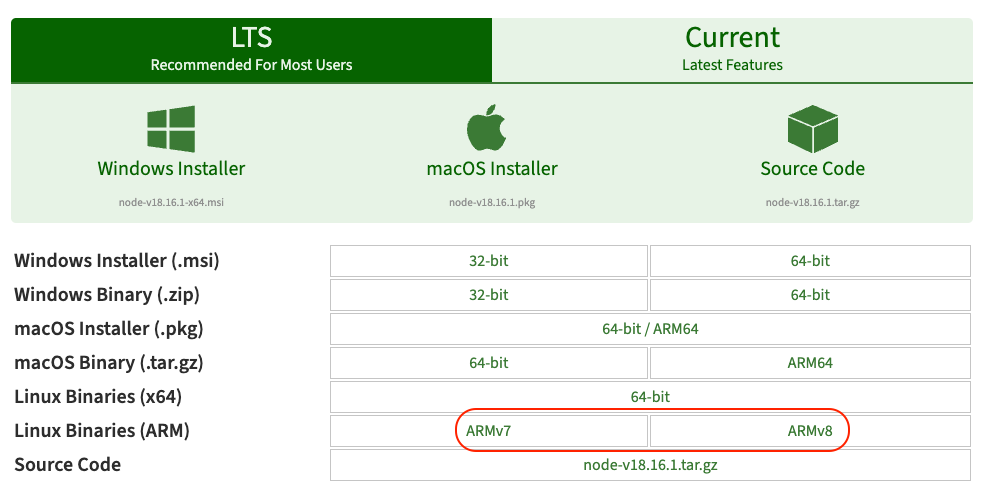
Right click and copy link address (eg: https://nodejs.org/dist/v18.16.1/node-v18.16.1-linux-armv7l.tar.xz) and then use wget to download the file.
sudo wget https://nodejs.org/dist/v18.16.1/node-v18.16.1-linux-armv7l.tar.xzThen extract it:
sudo tar -xvf https://nodejs.org/dist/v18.16.1/node-v18.16.1-linux-armv7l.tar.xz- the
-xflag means extract - the
-vflag means verbose mode - the
-fflag means perform the operation on this file
To run node from any directory, we need to copy the files we extracted to a folder that is in our PATH. To view your PATH run:
echo $PATH
cd (change directory) into your node folder you extracted and use the cp (copy) command:
sudo cp -R * /user/local/binFinally run node -v to see if it was installed successfully.