


This was an interesting challenge and one where I couldn’t find step by step instructions on Google or the Mulesoft website. So I ended up trying this myself and hope this is useful for others.
Prerequisite:
– Access to AWS EC2 environment.
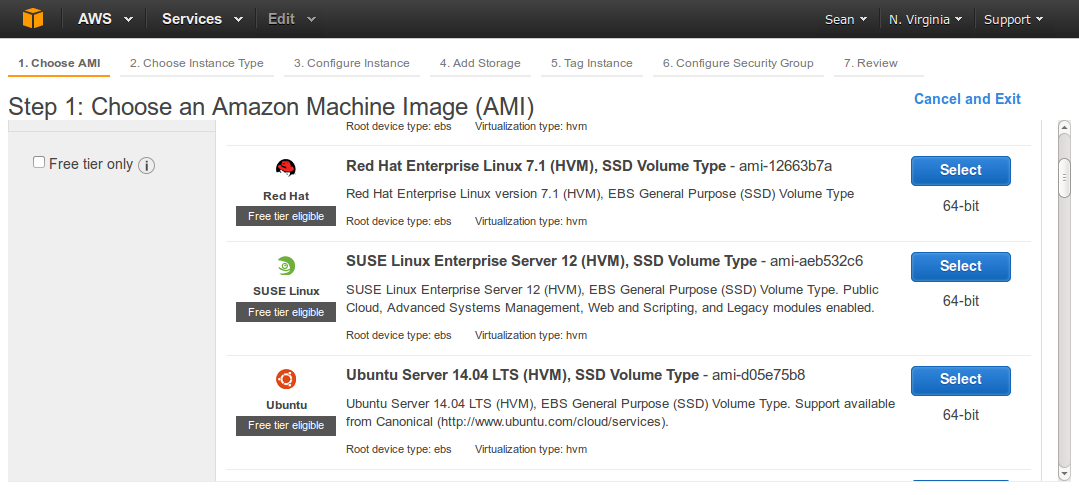
Step 1: Create a new instance
Launch a new Ubuntu instance.
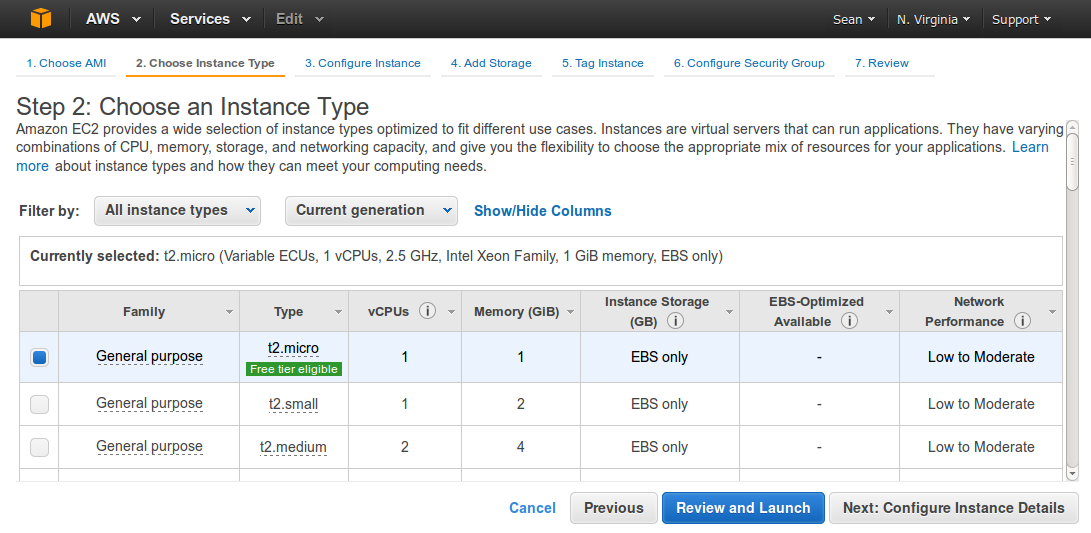
Choose at least t2.small or above because you need at least 2Gb of RAM.
Then click Review and Launch >> Launch
If you choose t2.micro or anything with less RAM, you’ll get this error:
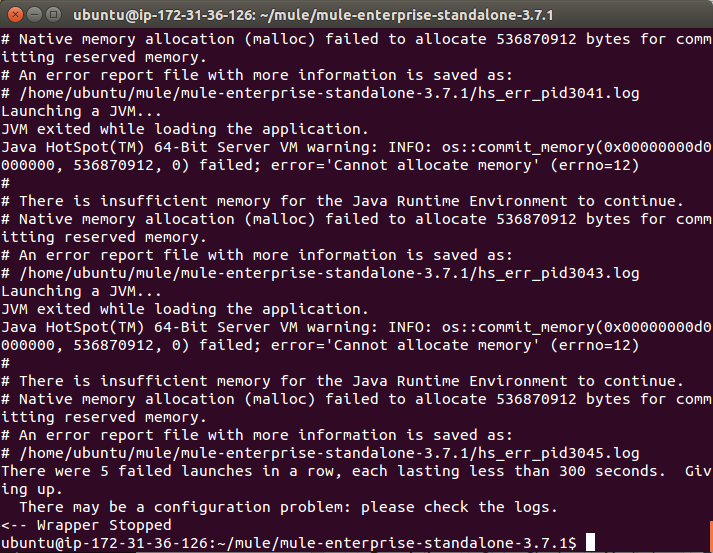
ie Mulesoft There is insufficient memory for the Java Runtime Environment to continue. error’=Cannot allocate memory’
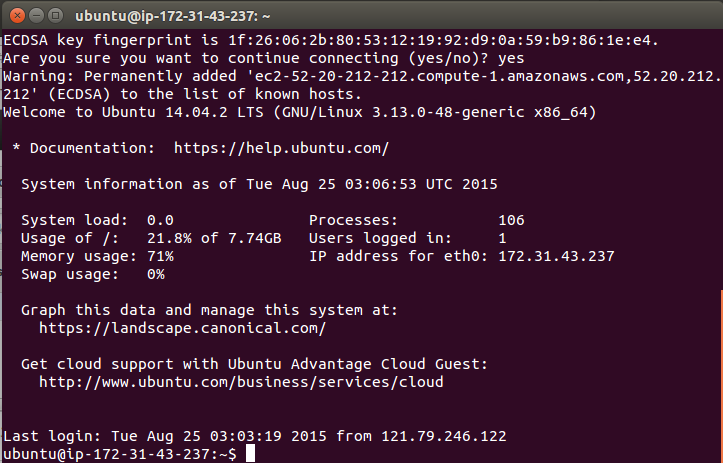
Step 2: Connect to your instance.
You will have had to create some keys to allow you to connect to the instance via command line. See this link here if you need a refresher. http://docs.aws.amazon.com/AWSEC2/latest/UserGuide/AccessingInstancesLinux.html
To connect, use this format
ssh -i /path/to/cert ubuntu@ec2-xxx-xxx-xxx-xxx.compute-1.amazonaws.com
The command I used to connect to my instance was:
ssh -i muledemo.pem ubuntu@ec2-52-20-212-212.compute-1.amazonaws.com
Now you are in a basic Ubuntu environment where you can now start to install Mule.
Step 3: Install Mule
mkdir mule
cd mule
wget http://s3.amazonaws.com/70aaf9be67f9bf88e5e78adcd7d6aa34/mule-ee-distribution-standalone-3.7.1.tar.gz
tar -xvzf mule-ee-distribution-standalone-3.7.1.tar.gz
This translates to:
- create a directory
- go into the directory
- download Mule EE
- extract the file
Now we can try and start it by running:
./mule-enterprise-standalone-3.7.1/bin/mule
You should get this error:

ie Mule: ERROR: java could not be found. PLease install the JRE or JDK
This is a good sign.
Step 4: Install Java
To get rid of this we need to install Java. Run these commands:
sudo add-apt-repository ppa:webupd8team/java
sudo apt-get update
sudo apt-get install oracle-java8-installer
Now if you run
java -version
you should get:

Now try to run mule again by typing
./mule-enterprise-standalone-3.7.1/bin/mule
and you should get:
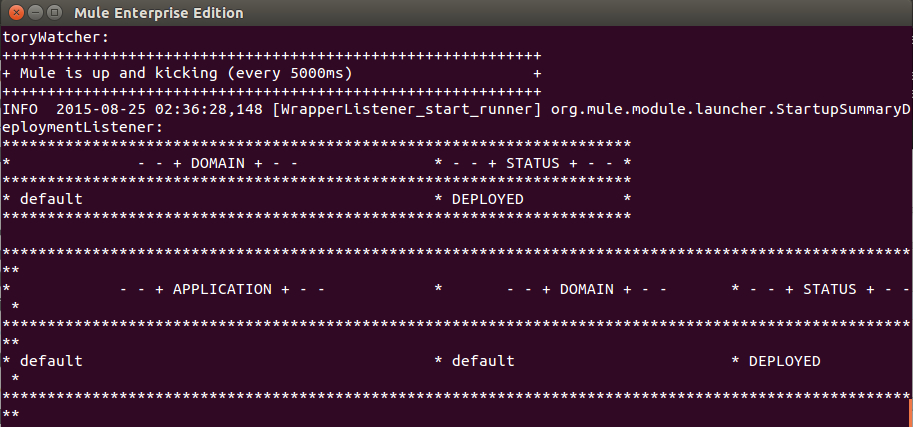
Congratulations! You now have Mule up and running.
Next you can add how to get Mule up and running as a Service on AWS Ubuntu. I have directions here
https://github.com/jamesontriplett/mule_ubuntu_mule_init
The Github link is incorrect or moved to https://github.com/jamesontriplett/mule_linux_service_install
Is it possible to have clustering ?
Yes you can. I haven’t tried it but just follow the docs.
I am trying to install a local mule installation tar.zip file. I have transferred that over via FileZilla onto my mule folder. I am unable to check if the mule if up and running on windows. Is there any specific command for that?